HTC Tattoo hard reset

The most convenient way to do a factory reset is via the phone settings.

1. Press HOME > MENU, and then tap Settings > SD card & phone storage > Factory data reset.
2. On the Factory data reset screen, tap Reset phone, and then tap Erase everything. Your phone will erase all personal data and restart. It may take a few minutes for the process to complete.

Performing a factory reset using phone buttons

If you cannot turn on your phone or access the phone settings, you can still perform a factory reset by using the phone buttons.

1. With the phone turned off, press and hold the HOME and BACK buttons, and then briefly press the END CALL/POWER button.
2. Press the ENTER button to begin the reset process. (Otherwise, press the END CALL/POWER button to cancel.)

ที่มา: htc.com

Decoding .flac files with Winamp

1.  Open Winamp and select Options and then Preferences… (note: if you’re using the “classic version” skin, open the Winamp Preferences by clicking the Control and p keys on your keyboard)

001_1

2. Select Output from the Plug-ins section of the left window, and then select Nullsoft Disk Writer. Click Configure.
002_1
3.Click the Directory: button so you can choose a location to save the .wav files
003_1

4. Navigate to the folder you want to save the .wav files in. I usually save them in the same folder as the .flac files.
004_0

5. Click OK to return to the Preferences window, and then Close to return to Winamp. Now select File -> Play file… and navigate to the folder with your .flac files. Select all of the .flac files by single-clicking the first file, holding down the Shift key on your keyboard, and then single-clicking the last file. When all of the files are selected, click Open
005_0

6. Press the Play button. Winamp will now decode the .flac files and turn them into .wav files. It typically takes about 20 seconds to convert a 5 minute song, but this depends on how “fast” your PC is.

Once Winamp is done decoding the files, make sure to set the Plug-ins -> Output back to DirectSound output, or the next time you try to play a file using Winamp, it will decode that file instead.

Check to make sure all of the .wav files were created.

006_0

ที่มา: Simple Help

Hosting Project on code.google.com

ก่อนอื่นต้องมีปัญชีผู้ใช้ gmail ก่อน

จากนั้นดู ขั้นตอนเบื้องต้นได้ที่ http://code.google.com/p/support/wiki/GettingStarted

ลงมือสร้าง Project ใหม่ได้ที่ http://code.google.com/hosting/createProject

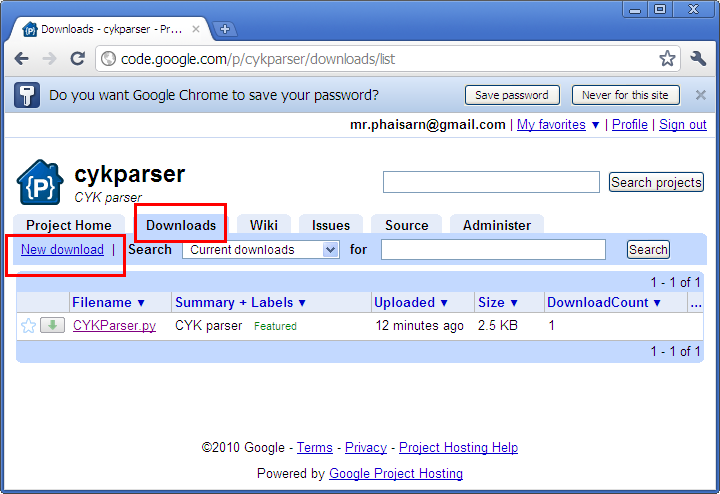
หลังจากสร้าง Project เสร็จแล้ว ก็ Upload ไฟล์ขึ้นไปได้ที่ Tab Download > New download

newdownload

แต่ถ้าจะใช้ Command Line Interface (CLI) บน Ubunu ก็ให้ติดตั้ง Package ดังนี้
sudo apt-get install subversion

จากนั้นให้ไปที่ Tab Source ดังรูป

source

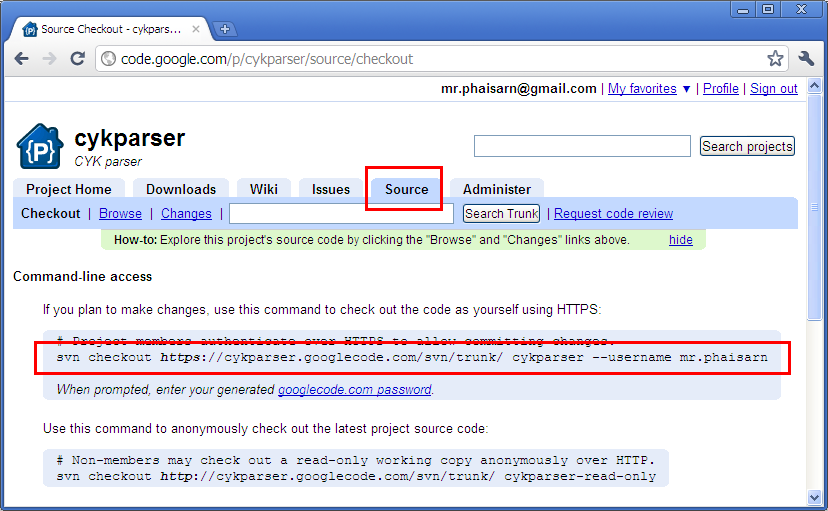
ก็ให้เปลี่ยน Directory ปัจจุบัน ไปยังตำแหน่งที่ต้องการจะใช้งานร่วมกับ SVN จากนั้นก็พิมพ์คำสั่งตามนั้นได้เลย

svn checkout https://cykparser.googlecode.com/svn/trunk/ –username mr.phaisarn

cykparser คือในรูปคือชื่อ Directory ดังนั้นถ้าไม่พิพม์ cykparser ก็จะได้ Directory trunk มาแทน

เมื่อ checkout มาแล้ว ทำการแก้ไขเสร็จ ถ้าต้องการ update กลับไปให้ใช้คำสั่ง

svn commit <path_to_filename>

รอสักแป๊บ จะเห็น nano editor ขึ้นมาให้พิมพ์ข้อความกำกับว่า  revision นี้ได้แก้ไขอะไรไปบ้าง ทำการ Save และออกมาจากนั้นรอแป๊บนึง เป็นอันเสร็จ

คำสั่งอื่นๆของ svn client

svn add /path/to/file – เปลี่ยนสถานะไฟล์เป็น added รอการเพิ่มไฟล์เข้าสู่ reo
svn delete /path/to/file – เปลี่ยนสถานะไฟล์เป็น deleted รอการลบไฟล์จาก repo
svn update [/path/to/file] – update version ของไฟล์บน client ให้เป็นเหมือน server เปรียบเหมือน ftp download หากสั่ง update เฉยๆ โดยไม่ใส่ตำแหน่งไฟล์ จะเป็นการ update ไฟล์ใหม่ทั้งหมด
svn commit [/path/to/file] – update version ของไฟล์บน server ให้เหมือนบน client เปรียบเหมือน ftp upload หากสั่ง commit เฉยๆ โดยไม่ใส่ตำแหน่งไฟล์ จะเป็นการ update ไฟล์ทั้งหมด
svn status – ใช้ดูสถานะไฟล์ใน working copy

ที่มา: code.google.comubuntuclub.comการใช้งาน subversion เบื้องต้น