สอนวิธีการลง Windows 7 จาก USB แบบง่ายๆ (ลองแล้ว ใช้ได้)

 สอนวิธีการลง Windows 7 จาก USB แบบง่ายๆ


สอนวิธีการลง Windows 7 จาก USB flash drive  แบบง่ายๆ
หลายคนไม่อยากพก DVD ลง Windows 7กันใช่ไหมละครับ วันนี้ผมจะมาบอกวิธีการลง Windows 7 ผ่าน usb ตัวจิ๋วของเราดีกว่าครับ ลงง่ายๆ สบายๆ ลงไปกินขนมรอไป ฮ่าๆๆ
ผมว่าการลงWindowsผ่าน USB ก็ง่ายดีนะครับ แต่การลง Windows 7 ก็เหมือนกับการลงแบบแผ่นนั้นแหละครับ แต่แตกต่างแึ่ค่ใช้ DVDกับ USB เนอะ ส่วนวิธีการลง Windows 7


def-thumb_100

สิ่งที่เราต้องเตรียมในการลง Windows 7แบบ USB

  1. USB&Flash Drive
  2. ISO Windows 7 หรือ แผ่น Windows 7
  3. Program WinToFlash << โหลดได้จาก Google ลองหาดูครับ (Download ได้ด้านล่าง)


ขั้นตอนการเตรียม USB ให้ Boot Windows 7ครับ

1. ให้ทำการโหลด WinToFlash มาไว้ในเครื่องเรา และทำการแตกไฟล์ซิปครับ

จากนั้น Double Click  File WinToFlash

USB_windows7_1

2. ขั้นตอนนี้คลิก Next อย่างเดียวครับ

USB_windows7_2


3. เลือก I cccept EULA และ Next

USB_windows7_3


4. กด Next เลยครับ แต่ถ้าใครมี License ก็กด Activate licesne ไปนะครับ

แต่ผมไม่มีเลยกด Next ไปเลย

USB_windows7_4


5. กด Next

USB_windows7_6


6. กดที่ Windows Setup transfer wizard


USB_windows7_7


8.

Windows file path : ให้เลือกเรา Drive DVD ที่เราใส่แผ่น windows 7 ไว้ครับ หรือ Virtual Drive ที่เรา Mount image windows 7 ไฟล์ .ISO เอาไว้

USB Drive: ให้เราเลือก Driveของ USB เราครับ

กด Next

USB_windows7_9


9. กด I accepted > continue

USB_windows7_10


10. รอกว่าจะโอนไฟล์เสร็จครับ


หลังจากนั้นลองเอา USB ของเราไปลง Windows 7 ดูครับ ก็จะลงได้สบายๆเลยครับ

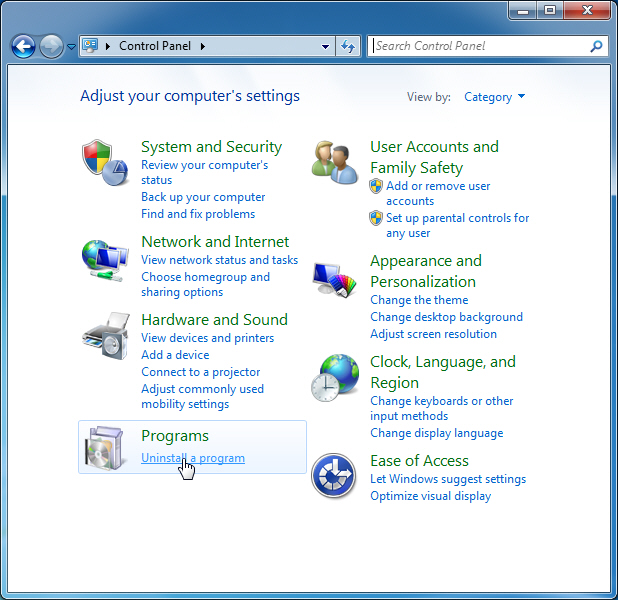
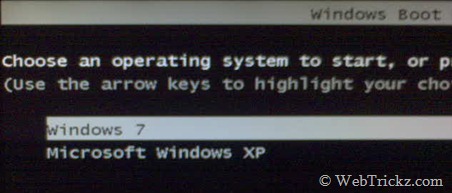
คอมพิวเตอร์ที่ลง windows 7 จาก USB ได้ ต้องสามารถตั้ง Boot จาก USB ได้นะครับ ถ้าเราจะทำก็ให้ไปตั้งBootผ่าน USB เป็นอันดับแรกครับ


[Tips] Clearing Memory Cache to Speed Up Your Windows 7

When your computer is running for quite some time, you will notice that it slows down due to idle processes. You can use this method to free up unused RAM and speed up your computer. It requires you to create a desktop shortcut and then open it to clear the memory cache.

First right-click anywhere on the desktop and select New > Shortcut.new shortcut windows 7

Now enter the following line when asked for location of the shortcut and hit Next:

%windir%\system32\rundll32.exe advapi32.dll,ProcessIdleTasks

clear unused RAM Shortcut

Give it any name and hit Finish.

Clear Ram windows 7


Ref: addictivetips.comwindows7hacker.com

Automating the Windows GUI

Auto IT
http://www.autoitscript.com/site/autoit
AutoIt v3 is a freeware BASIC-like scripting language designed for automating the Windows GUI and general scripting. It uses a combination of simulated keystrokes, mouse movement and window/control manipulation in order to automate tasks in a way not possible or reliable with other languages (e.g. VBScript and SendKeys). AutoIt is also very small, self-contained and will run on all versions of Windows out-of-the-box with no annoying “runtimes” required!

SeleniumHQ
http://seleniumhq.org/
Primarily it is for automating web applications for testing purposes, but is certainly not limited to just that. Boring web-based administration tasks can (and should!) also be automated as well.

Config IIS7 and SMTP E-mail (Windows 7)

Config IIS7 and SMTP E-mail (Windows 7) เป็นวิธีการเปิดการใช้งาน SMTP-Email บน IIS7 (Windows 7) ในการส่งอีเมล์ด้วย Application .NET Framework


Windows 7

เปิด Control Panel ได้ที่


Start -> Control Panel


ให้ไปที่ Turn Windows features on or off

IIS7 & SMTP (Windows 7)


Internet Information Services -> World Wide Web Services -> Application Development Features -> ASP.NET


IIS7 & SMTP (Windows 7)

กำลังติดตั้ง อาจจะต้องทำการ Restart เครื่องหากมีการร้องขอ

IIS7 & SMTP (Windows 7)

เมื่อเปิด IIS ขึ้นมาก็จะมี Icon ของ SMTP E-Mail ตามรูป

IIS7 & SMTP (Windows 7)

สามารถกำหนดค่า IP ของ SMTP หรือว่าจะเก็บอีเมล์ของใน Queue

IIS7 & SMTP (Windows 7)

คลิกที่ Apply

IIS7 & SMTP (Windows 7)

ถ้ามีการลงใน Queue ก็จะเป็นเหมือนดังรูป

IIS7 & SMTP (Windows 7)


ที่มา: thaicreate.com

runtime error, transfermgr.exe

runtime error, transfermgr.exe

วิธีแก้ปัญหาชั่วคราวคือ ตัดการเชื่อมต่อ Internet ออกก่อน เช่นถอดสาย Lan ออก หรือปิด Wireless
แล้วเปิดโปรแกรม Microsoft File Transfer Manager
อยู่ที่ C:\Windows\Downloaded Program Files\TransferMgr.exe
ซึ่งโปรแกรมจะแจ้งว่า ติดต่อ Update Server ไม่ได้ ก็ช่างมัน
จากนั้นเสียบสาย Lan กลับเข้าไป แล้วก็เข้าเว็บโหลดได้ตามปรกติเลย
ถ้าปิดโปรแกรมเมื่อไหร่ ก็ต้องทำแบบนี้อีก

ที่มา: blognone.com

ถ้าจะ Download โปรแกรม transfermgr ใหม่ สามารถ Download ได้ที่ transfers.ds.microsoft.com/

วิธีการติดตั้ง IIS 7 บน Windows 7

1. Start -> Control Panel จะแสดงหน้าจอของ Control Panel

เลือก Uninstall a Program ดังรูป

คลิกที่ Turn Windows features on or off ซ้ายมือ และคลิกเลือกที่ Option ของ Internet Information Service


ถ้าทดสอนการทำงานโดยรัน http://localhost แล้วปรากฏดังหน้าจอแสดงว่าสามารถใช้งาน IIS7 กับ Windows 7 ได้แล้วครับ

การ Config IIS7 บน Windows 7

เลือกที่เมนู Administrative Tools

Internet Information Services (IIS) Manager

หน้าจอ ของ Internet Information Services (IIS) Manager

ที่มา: thaicreate.com

Quad boot

  1. ใช้ Disk Utilities จัดเตรียม Partition ดังนี้
    • /dev/hda2 MacOS
    • /dev/hda3 Windows 7
    • /dev/hda4 Windows XP
    • /dev/hda5 Ubuntu
    • /dev/hda6 Swap
  2. ติดตั้ง MacOS X
  3. ติดตั้ง rEFIt แล้ว Restart สัก 2 ครั้ง
  4. ติดตั้ง Ubuntu
  5. ติดตั้ง Windows 7
  6. ติดตั้ง Windows XP
  7. กู้คืน bootloader ของ Windows 7
  8. ติดตั้ง dual boot (Windows XP & Windows 7)
  9. กู้คืน GRUB2

Note: GRUB2 ติดตั้งที่ MBR, bootloader ของ Windows ติดตั้งที่ Partition ของ Windows 7

How to install Windows XP over Windows 7 in a dual boot ?

ติดตั้ง Windows 7 และ Windows XP ตัวเต็มในเครื่องเดียวกัน โดยสามารถเลือกได้ว่าจะใช้งาน OS ตัวไหน

DSC00107

  1. Windows 7 บน Drive C
  2. Windows XP บน Drive D โดยหลังจาก Restart เครื่อง จะ boot เข้า Windows XP เพราะ bootloader ของ Windows XP ทำการเขียนทับ bootloader ของ Windows 7
  3. To restore Windows 7, you need to Boot from the Windows 7 DVD and “Repair your computer
  4. After repairing, your system will restart and boot into Windows 7.
  5. Download and Install EasyBCD (2.0.2) on your Windows 7 to add boot entry for XP.
  6. Launch the program and select ‘Add New Entry’. Under “Operating Systems” open the Windows tab, select the Type as “Windows NT/2k/XP/2k3” and click on ‘Add Entry’.
    EasyBCD
  7. The entry for Windows XP would be added instantly. You can choose the default OS to boot and modify the boot menu time-out from “Edit Boot Menu” option.

ที่มา: webtrickz.com/