
Creating and Using Bitmaps and Icons
ที่มา: http://msdn.microsoft.com/en-us/library/ms228345(v=vs.90).aspx
Monthly Archives: May 2011
UIImagePickerController, UIImage, Memory and More!
ที่มา: stackoverflow.com
Convert Image to Icon
แปลงไฟล์ภาพ ไปเป็น icon มี 2 ตัวอย่าง ดังนี้
/// <summary>
/// Converts an image into an icon.
/// </summary>
/// <param name=”img”>The image that shall become an icon</param>
/// <param name=”size”>The width and height of the icon. Standard
/// sizes are 16×16, 32×32, 48×48, 64×64.</param>
/// <param name=”keepAspectRatio”>Whether the image should be squashed into a
/// square or whether whitespace should be put around it.</param>
/// <returns>An icon!!</returns>
private Icon MakeIcon(Image img, int size, bool keepAspectRatio) {
Bitmap square = new Bitmap(size, size); // create new bitmap
Graphics g = Graphics.FromImage(square); // allow drawing to it
int x, y, w, h; // dimensions for new image
if(!keepAspectRatio || img.Height == img.Width) {
// just fill the square
x = y = 0; // set x and y to 0
w = h = size; // set width and height to size
} else {
// work out the aspect ratio
float r = (float)img.Width / (float)img.Height;
// set dimensions accordingly to fit inside size^2 square
if(r > 1) { // w is bigger, so divide h by r
w = size;
h = (int)((float)size / r);
x = 0; y = (size – h) / 2; // center the image
} else { // h is bigger, so multiply w by r
w = (int)((float)size * r);
h = size;
y = 0; x = (size – w) / 2; // center the image
}
}
// make the image shrink nicely by using HighQualityBicubic mode
g.InterpolationMode = System.Drawing.Drawing2D.InterpolationMode.HighQualityBicubic;
g.DrawImage(img, x, y, w, h); // draw image with specified dimensions
g.Flush(); // make sure all drawing operations complete before we get the icon
// following line would work directly on any image, but then
// it wouldn’t look as nice.
return Icon.FromHandle(square.GetHicon());
private void cmdConvert_Click(object sender, EventArgs e)
{
string source = @”d:\image.bmp”;
string target = @”d:\image.ico”;
BmpToIcon(source, target);
}
public static void BmpToIcon(string sourcePath, string
targetPath)
{
// Retrieve the bitmap from the file.
Bitmap bmp = (Bitmap)Image.FromFile(sourcePath);
// Convert the bitmap to an icon.
Icon ico = Icon.FromHandle(bmp.GetHicon());
// Create a file stream to save the icon stream.
Stream st = new FileStream(targetPath, FileMode.Create);
// Create a stream writer to physical write the data to
the disk.
BinaryWriter wr = new BinaryWriter(st);
// Write the binary icon data to the file stream.
ico.Save(st);
// Close the file to write the stream to the disk.
wr.Close();
เขียนสคริปส่ง e-mail ด้วย PHP
form_sendmail.html
[code lang=”html”]
<!DOCTYPE html PUBLIC "-//W3C//DTD XHTML 1.0 Transitional//EN" "http://www.w3.org/TR/xhtml1/DTD/xhtml1-transitional.dtd">
<html xmlns="http://www.w3.org/1999/xhtml">
<head>
<meta http-equiv="Content-Type" content="text/html; charset=utf-8" />
<title>Untitled Document</title>
</head>
<body>
<form action="sendmail.php" method="post">
<p>ทดสอบการส่ง e-mail</p>
<table width="400" border="0">
<tr>
<td>To:</td>
<td><input name="MailTo" type="text" /></td>
</tr>
<tr>
<td>Subject:</td>
<td><input name="MailSubject" type="text" /></td>
</tr>
<tr>
<td> Message:</td>
<td><textarea name="MailMessage" ></textarea></td>
</tr>
<tr>
<td>From:</td>
<td><input name="MailFrom" type="text" /></td>
</tr>
<tr>
<td> </td>
<td><input type="submit" name="submit" value="Submit" /></td>
</tr>
</table>
</form>
</body>
</html>
[/code]
sendmail.php
[code lang=”php”]
<!DOCTYPE html PUBLIC "-//W3C//DTD XHTML 1.0 Transitional//EN" "http://www.w3.org/TR/xhtml1/DTD/xhtml1-transitional.dtd">
<html xmlns="http://www.w3.org/1999/xhtml">
<head>
<meta http-equiv="Content-Type" content="text/html; charset=utf-8" />
<title>Untitled Document</title>
</head>
<body>
<p><a href="form_sendmail.html">form_sendmail</a></p>
<?php
$MailTo = $_POST[‘MailTo’] ;
$MailFrom = $_POST[‘MailFrom’] ;
$MailSubject = $_POST[‘MailSubject’] ;
$MailMessage = $_POST[‘MailMessage’] ;
$Headers = "MIME-Version: 1.0\r\n" ;
$Headers .= "Content-type: text/html; charset=UTF-8\r\n" ;
$Headers .= "From: ".$MailFrom." <".$MailFrom.">\r\n" ;
$Headers .= "Reply-to: ".$MailFrom." <".$MailFrom.">\r\n" ;
$Headers .= "X-Priority: 3\r\n" ;
$Headers .= "X-Mailer: PHP mailer\r\n" ;
if(mail($MailTo, $MailSubject , $MailMessage, $Headers, $MailFrom))
{
echo "ส่ง e-mail เรียบร้อย" ; //ส่งเรียบร้อย
}else{
echo "ไม่สามารถส่ง e-mail ได้" ; //ไม่สามารถส่งเมล์ได้
}
?>
</body>
</html>
[/code]
ที่มา: thaicreate.com
C# Visual Studio: Change the default icon of your .exe file.
To change the default icon of your .exe file click on :
- ไปที่ Project
- คลิ๊กขวาที่ Project เลือก Properties
- เลือก Application
- ที่ Icon ทำการเลือก icon ที่ต้องการ
เรียบร้อย
หรือจะใช้คำสั่ง ดังนี้
this.Icon = new System.Drawing.Icon(“shuttle.ico”);
ที่มา: normankosmal.com, en.csharp-online.net
MDIList property missing?
การสร้างโปรเจ็กส์แบบ MDI
สิ่งสำคัญอย่างนึงคือการแสดงรายชื่อหน้าต่างย่อยบนเมนู Window ให้เลือกใช้ได้ง่ายๆ โดยการเขียน MDI ด้วย VS2003 ก็ใช้ MainMenu แล้วกำหนดคุณสมบัติ MDIList
แต่ตั้งแต่ VS2005 ไม่มี MainMenu ให้เลือกใช้ (แต่ถ้า Upgrade มาจาก VS2003 ก็ยังใช้ได้) ต้องเลือกใช้ MenuStrip แทน
แต่ MenuStrip ดันไม่มี MDIList property ให้ใช้
ทางแก้ก็ง่ายๆครับ
Me.MenuStrip1.MdiWindowListItem = WindowMenuToolStripItem
โดย WindowMenuToolStripItem คือ เมนูที่เราตั้งชื่อไว้ว่า Window ที่จะให้แสดงชื่อของหน้าต่างลูกนั่นเอง
Access two Gmail accounts at once in the same browser
To enable multiple sign-in:
- Go to the multiple sign-in settings page.
- Sign in to your account.
- Select On to enable the multiple sign-in feature and select the checkboxes to confirm that you understand how to use multiple sign-in. Read more about what you need to understand before using multiple sign-in.
- Click Save changes.
To enable multiple sign-in on additional accounts:
Once you’ve enabled multiple sign-in for one of your Google Accounts, follow the steps below to enable multiple sign-in for additional accounts you would like to sign in to:
- Sign in to a product that supports multiple sign-in, using an account that has multiple sign-in enabled.
- Click your name or email address at the top of the page.
- Select Sign in to another account from the drop-down menu.
- On the page that opens, enter the email address and password for another account you wish to access, and click Sign in.
วิธีการติดตั้ง IIS 7 บน Windows 7
1. Start -> Control Panel จะแสดงหน้าจอของ Control Panel
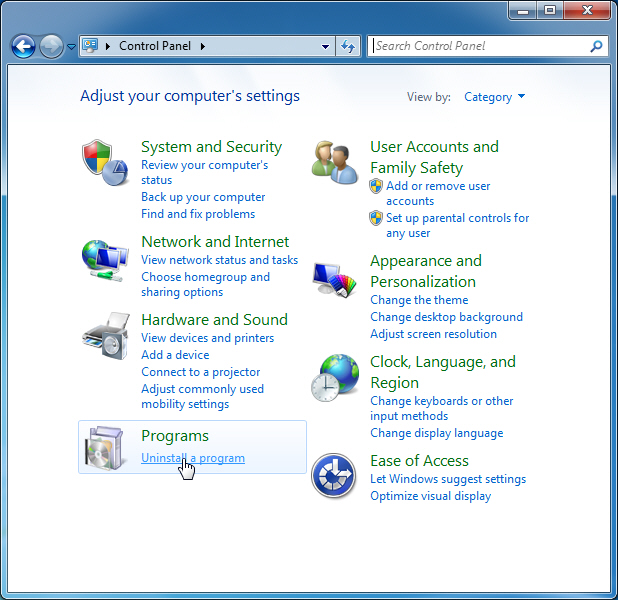
เลือก Uninstall a Program ดังรูป
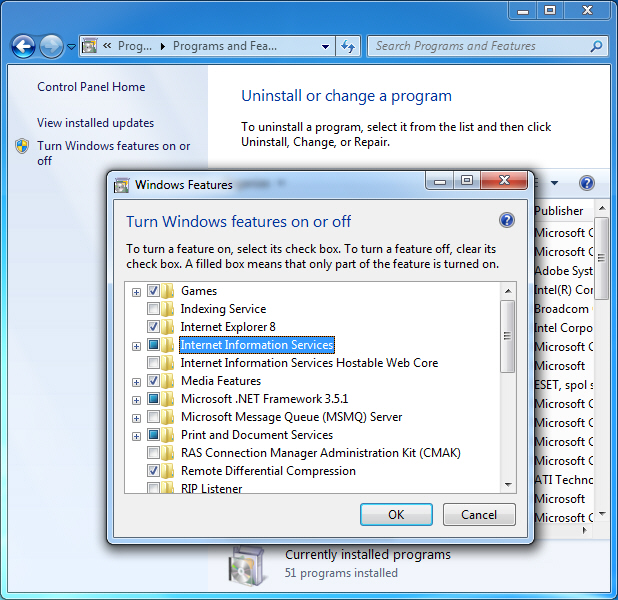
คลิกที่ Turn Windows features on or off ซ้ายมือ และคลิกเลือกที่ Option ของ Internet Information Service

ถ้าทดสอนการทำงานโดยรัน http://localhost แล้วปรากฏดังหน้าจอแสดงว่าสามารถใช้งาน IIS7 กับ Windows 7 ได้แล้วครับ
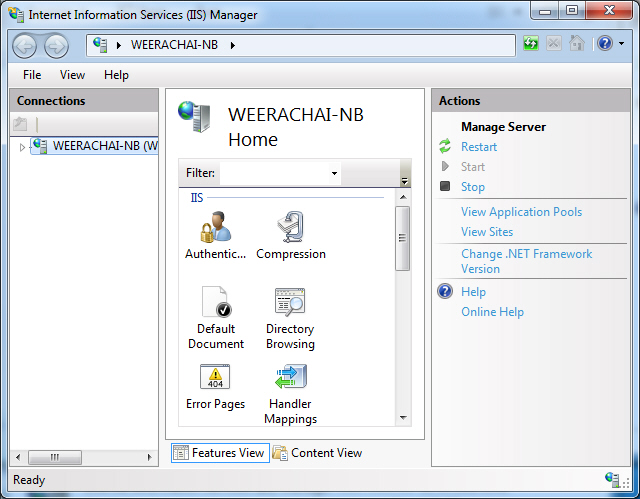
การ Config IIS7 บน Windows 7
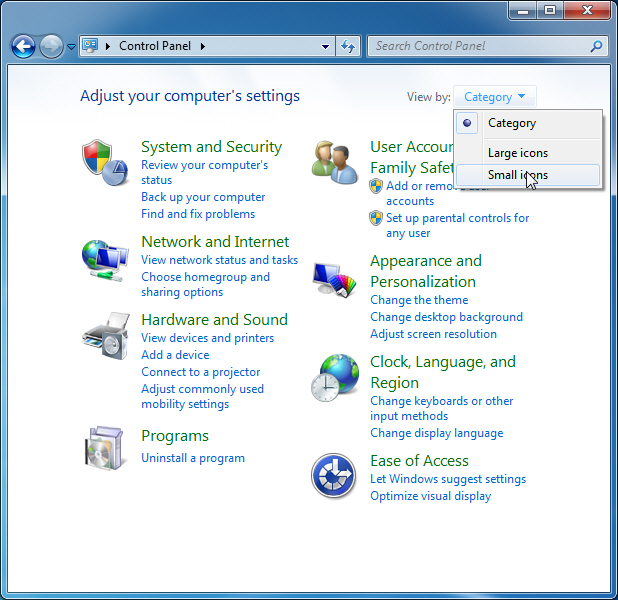
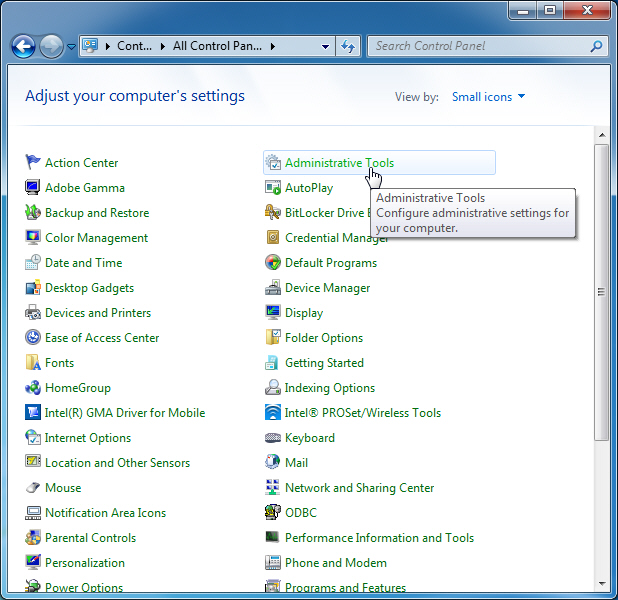
เลือกที่เมนู Administrative Tools
Internet Information Services (IIS) Manager
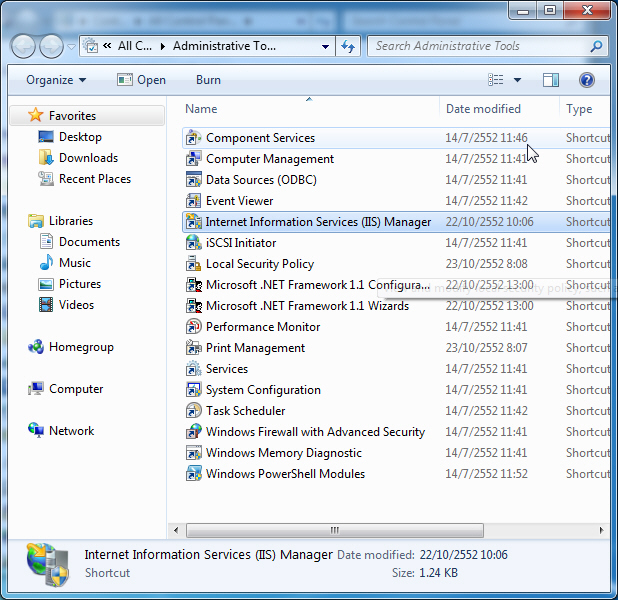
หน้าจอ ของ Internet Information Services (IIS) Manager
ที่มา: thaicreate.com
Microsoft Word 2010 Spacing
How To Modify Spacing Between Paragraphs
It is very easy to change the spacing before or after any particular paragraph or set of paragraphs. Simply select the paragraph(s) for which you are going to change the spacing and click on the Page Layout tab, here find the Paragraph group. Now choose the new spacing values in the form of points here.

How To Modify Spacing Between Lines
We have described the method of changing the space before and after the paragraph in the above section. Lets see how we can change the line spacing in your document. It is also very easy, click the Home menu and go to the Paragraph section here, and in the Line Spacing option, choose the new spacing that you need. You can double the line spacing by choosing 2 or triple it by choose 3 and so on.
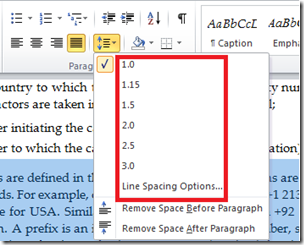
You can also remove spacing before or after the paragraph from this option. Enjoy!
ที่มา: addictivetips.com
Disable automatic login in Mac OS X
- Open the System Preferences application.
- Click on the “Accounts” icon in the System Preferences window.
- Click on the “Login Options” item in the list of accounts on the left side of the “Accounts” System Preferences window.
- Set the “Automatic login:” option to “Off.”
ที่มา: rit.edu/