
Monthly Archives: June 2018
ionic3 Login-Logout แบบมี SideMenu
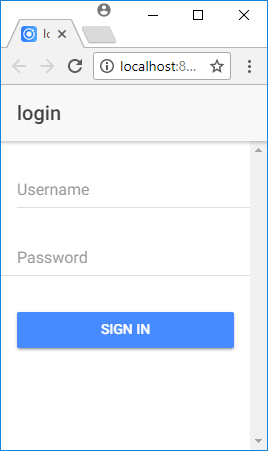
ภาพที่ 1 : เพจ Login ไม่อยู่ในแทบ และไม่แสดงเมนู (เพจอื่นๆนอกจาก Login แสดงเมนูได้)
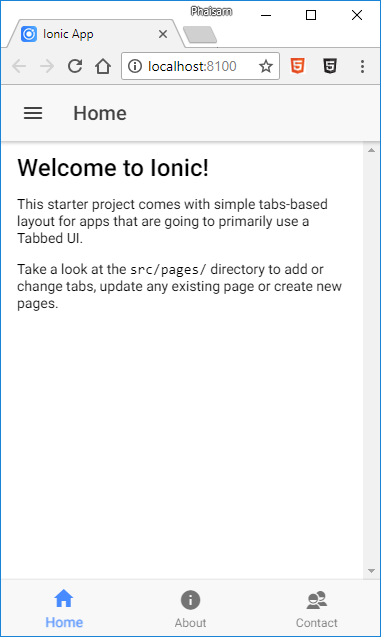
ภาพที่ 2 : เพจ Home, About และ Contact อยู่ในแทบ
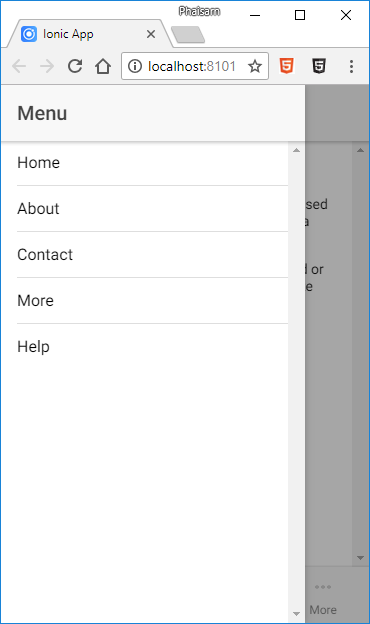
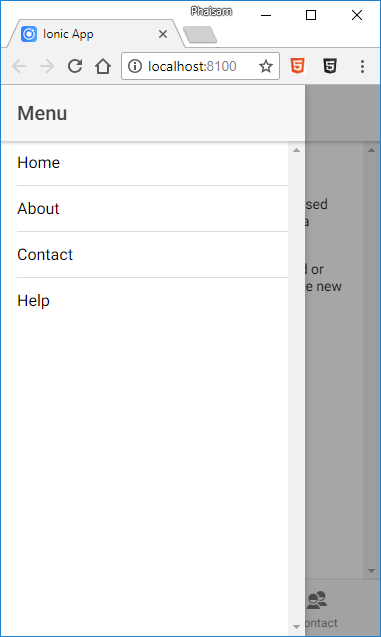
ภาพที่ 3 : กดด้านบนซ้าย หรือรูทจากหน้าจอด้านซ้ายมาด้านขวา แสดงเมนู
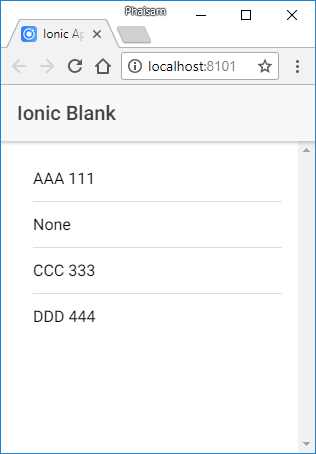
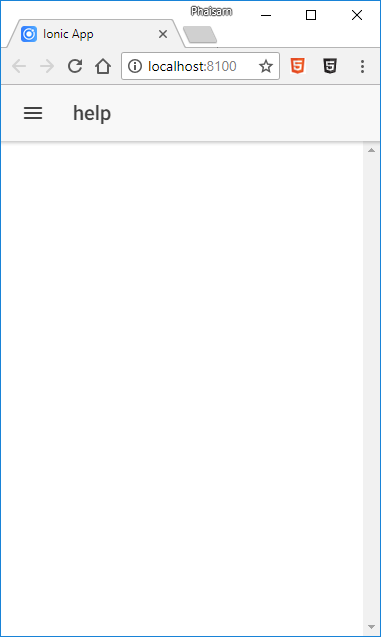
ภาพที่ 4 : เพจ Help ไม่อยู่ในแทบ
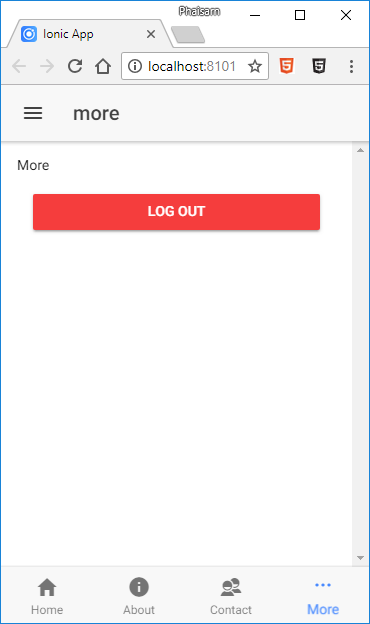
ภาพที่ 5 : เพจ More มีหน้าจอ logout
ionic3: การสร้าง SideMenu (tabs)
ภาพที่ 1 : เพจ Home, About และ Contact อยู่ในแทบ
ภาพที่ 2 : กดด้านบนซ้าย หรือรูทจากหน้าจอด้านซ้ายมาด้านขวา แสดงเมนู
ภาพที่ 3 : เพจ Help ไม่อยู่ในแทบ
สร้างโปรเจ็กส์ชื่อ blog
[code]
ionic start blog tabs
[/code]
สร้างเพจชื่อ help
[code]
ionic g page help
[/code]
หน้า Home, About และ Contact อยู่ในแทบ แต่หน้า Help ไม่อยู่ในแทบ
ionic : กำหนดหน้า default ให้กับ tabs
ionic: จำการ login ของผู้ใช้
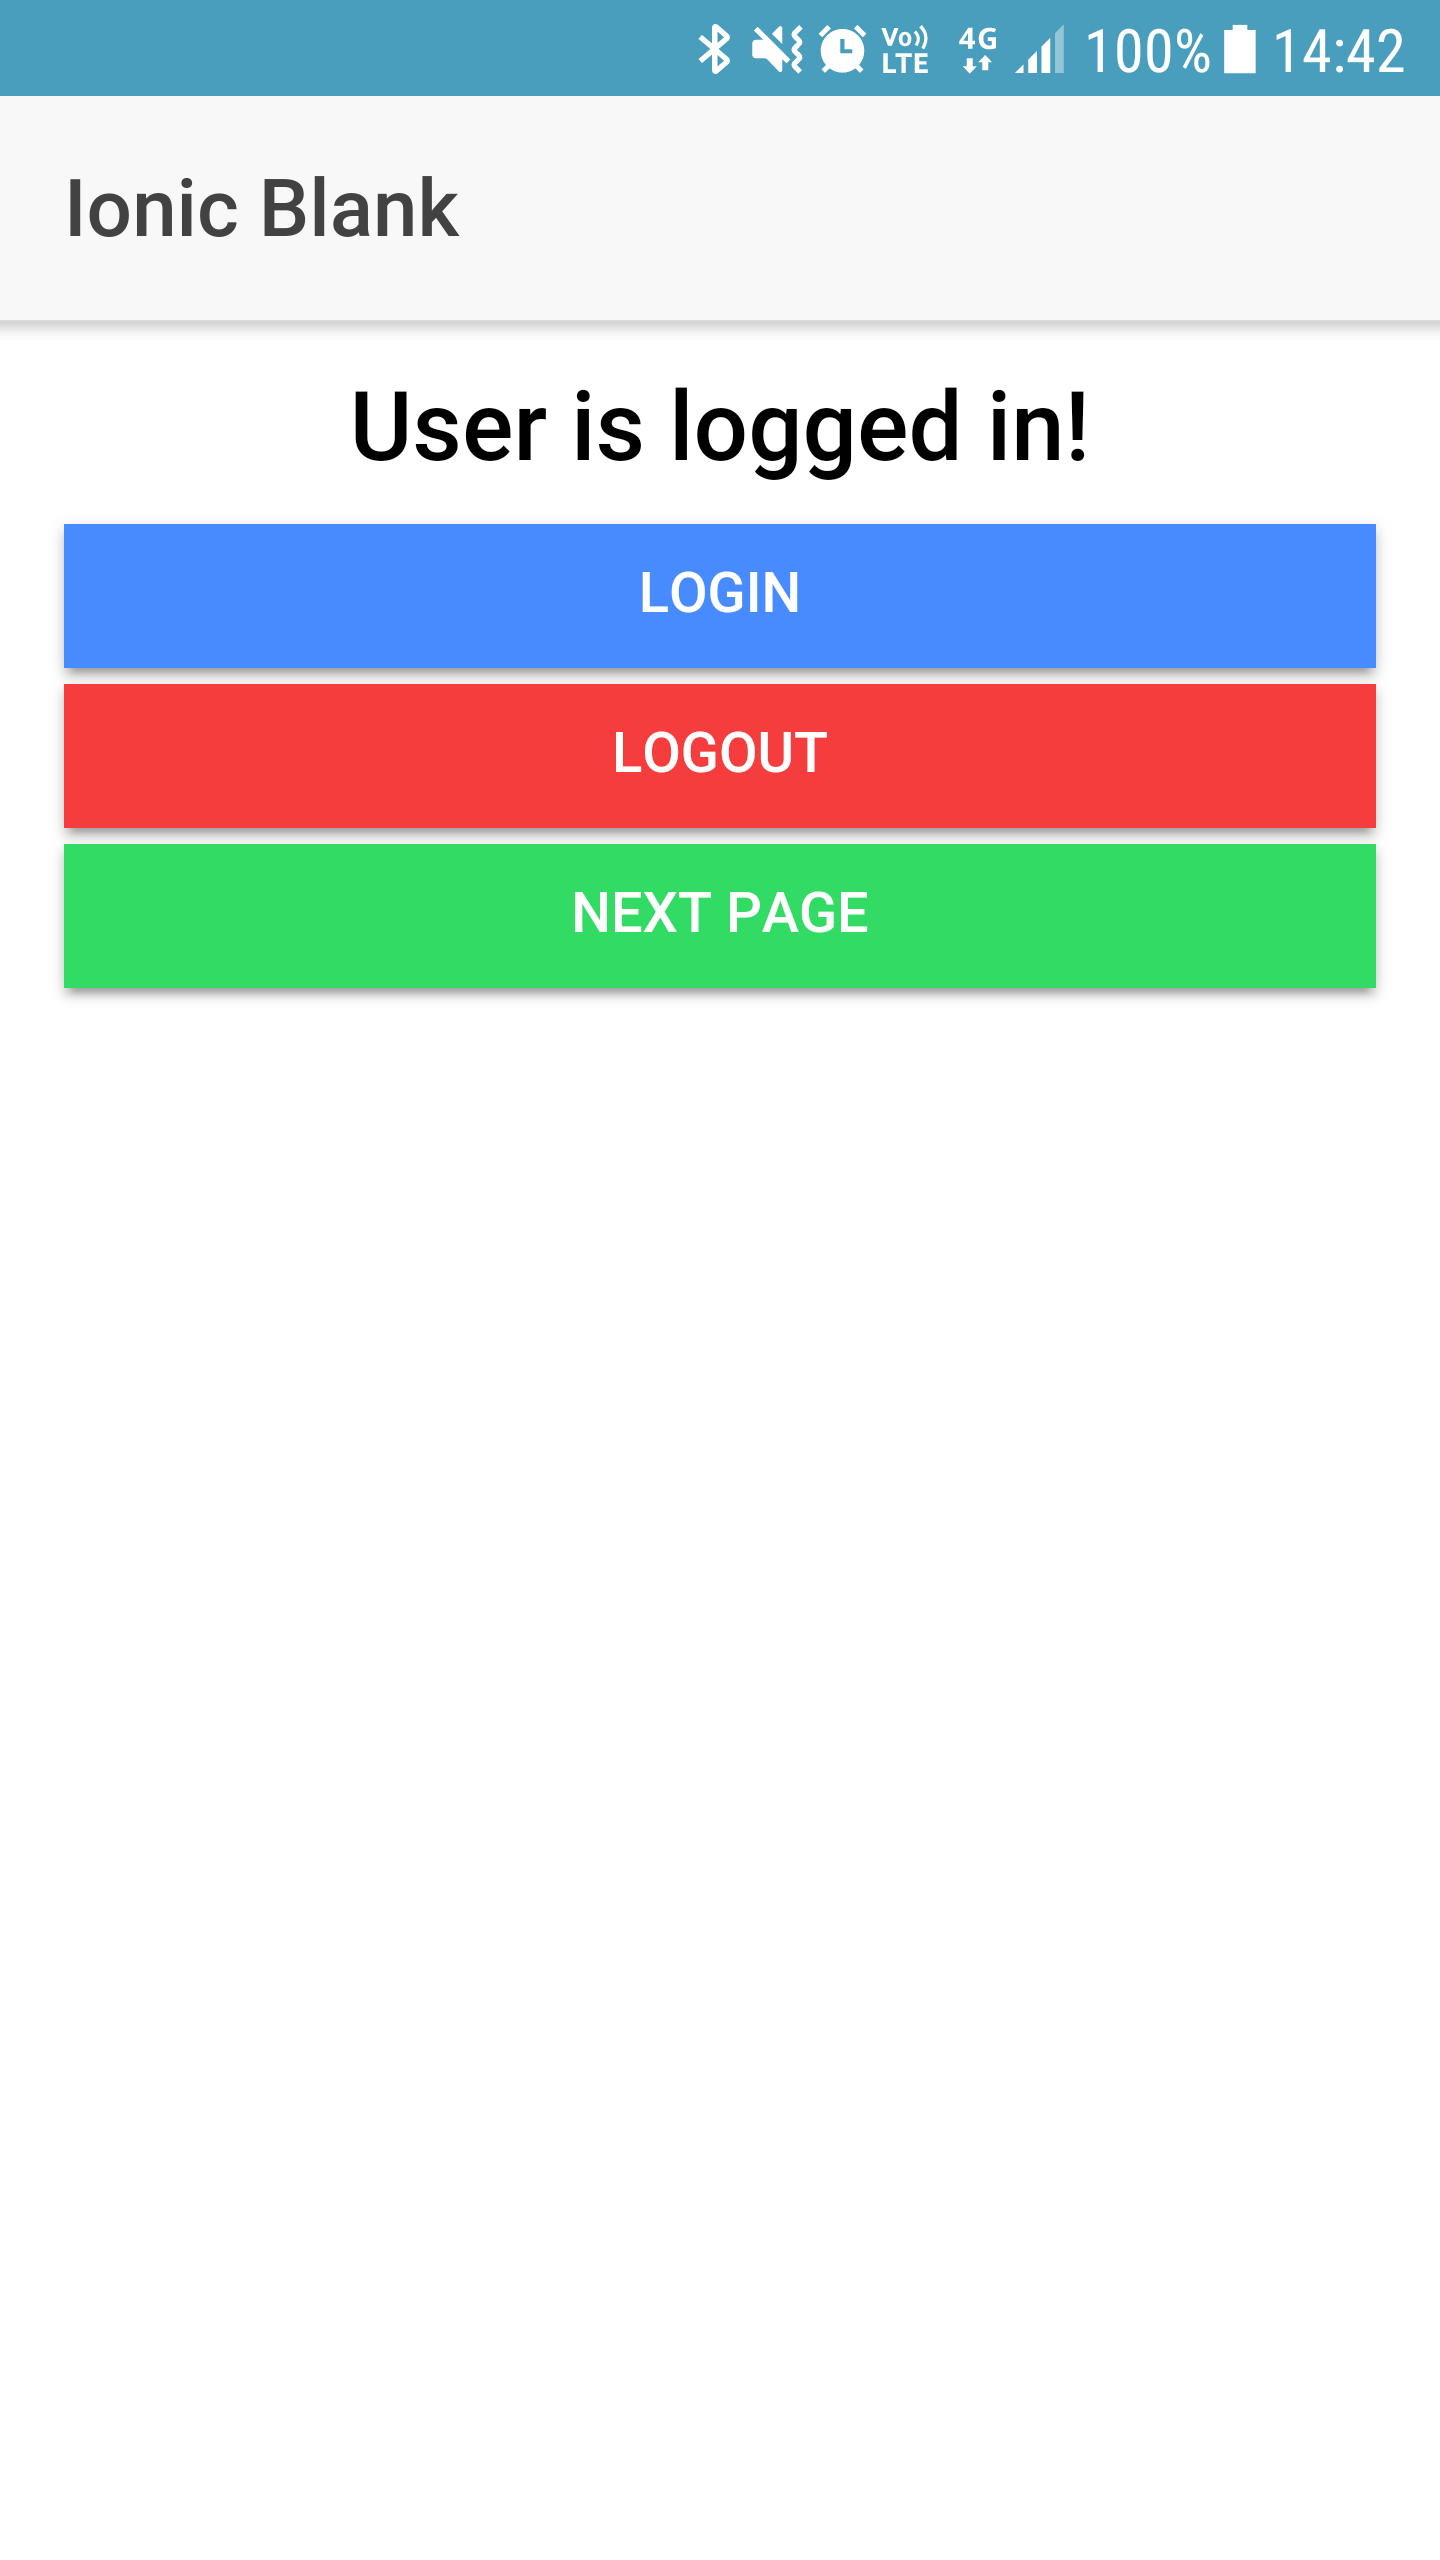
เปิดมาครั้งแรกจะขึ้นว่า User is not logged in!
ถ้ากดปุ่ม login จะขึ้น User is logged in! และจะสามารถกดปุ่ม Next Page เพื่อไปหน้าถัดไปได้
พอกด logout ก็จะกลับมาขึ้นว่า User is not logged in!

จำการ login ของผู้ใช้ โดยกาาเก็บ token ผู้ใช้ลง localStorage
แล้วใช้ Auth Guard ตรวจสอบข้อมูลดังกล่าว
โดย concept แล้ว Auth Guard เราใช้
- ionViewCanEnter()
- ionViewCanLeave()
ดู IONIC PAGE LIFECYCLE EVENTS ทั้งหมด
ionic3: การใช้งาน localStorage
การเก็บข้อมูลของ localStorage เก็บในลักษณะของ key/value
- การเขียนและอ่านข้อมูลจาก
localStorage - การอ่านข้อมูลจาก
localStorageโดยที่ยังไม่มี key นั้นอยู่ - การอ่านข้อมูลจาก
localStorageที่มี key นั้นเก็บอยู่ - การลบ localStorage โดยการกำหนด key
การกำหนดหน้าแรกที่จะแสดง
กำหนดหน้าแรกที่จะแสดงให้เป็นหน้า login
src/app/app.component.ts
|
1 2 3 4 5 6 7 8 9 10 11 12 13 14 15 16 17 18 19 20 21 22 23 24 25 26 |
import { Component } from '@angular/core'; import { Platform } from 'ionic-angular'; import { StatusBar } from '@ionic-native/status-bar'; import { SplashScreen } from '@ionic-native/splash-screen'; import { TabsPage } from '../pages/tabs/tabs'; import { LoginPage } from '../pages/login/login'; @Component({ templateUrl: 'app.html' }) export class MyApp { rootPage:any = LoginPage; constructor(platform: Platform, statusBar: StatusBar, splashScreen: SplashScreen) { platform.ready().then(() => { // Okay, so the platform is ready and our plugins are available. // Here you can do any higher level native things you might need. statusBar.styleDefault(); splashScreen.hide(); }); } } |
ดูตัวอย่างเต็มๆที่
สร้างหน้า Login – logout
ionic3: การใช้งานตัวแปร Date
- อ่านค่า Date() มาเก็บไว้ในตัวแปรสตริง แล้วเอาไปแสดงผล
- อ่านค่า วัน เดือน ปี
- ปรับเวลาตาม TimeZone
- ปรับแต่ง format การแสดงผล
ionic3 – คำนวณระยะทางระหว่างจุด 2 จุด (latitude-longitude points)
The Haversine Formula
พารามิเตอร์
lat1, lon1: The Latitude and Longitude of point 1 (in decimal degrees)
lat2, lon2: The Latitude and Longitude of point 2 (in decimal degrees)
|
1 2 3 4 5 6 7 8 9 10 11 12 13 14 15 16 17 18 19 20 21 22 |
toRad(value) { var RADIANT_CONSTANT = 0.0174532925199433; return (value * RADIANT_CONSTANT); } calculateDistance(lat1, lng1, lat2, lng2) { var KM_RATIO = 6371; try { var dLat = this.toRad(lat2 - lat1); var dLon = this.toRad(lng2 - lng1); var lat1Rad = this.toRad(lat1); var lat2Rad = this.toRad(lat2); var a = Math.sin(dLat / 2) * Math.sin(dLat / 2) + Math.sin(dLon / 2) * Math.sin(dLon / 2) * Math.cos(lat1Rad) * Math.cos(lat2Rad); var c = 2 * Math.atan2(Math.sqrt(a), Math.sqrt(1 - a)); return KM_RATIO * c * 1000; } catch (e) { return -1; } } |
Link
ASP.Net: login เข้าระบบด้วย Username โดยไม่เก็บ Email
เตรียมโปรเจ็กส์ก่อน โดยสร้างโปรเจ็กส์แบบ MVC แบบมี user
- แก้ไขหน้า Register
- แก้ไขหน้า Login
- IdentityConfig